Making pillow covers is a great DIY project for anyone. It brings a personal flair to your home decor. If you can sew just a little bit, you can make throw pillow covers. This will update your home for every season or give a room a quick makeover.
This guide focuses on simple envelope pillow covers. You won’t need zippers or buttons for these. Learning how to choose and prepare fabric, measure pillows, sew, and decorate is fun and fast. You’ll see it’s a project that’s both easy and quick to do, taking about 15 minutes per cover.
Even if you’re a beginner at sewing, you can do this. The tutorial is clear and encouraging. It suggests using the Braemore Gorgeous Pearl fabric. At $30 a yard, it’s great for these covers. You’ll need Euro inserts that are 26 x 26 inches. With just a yard of front fabric and a yard of neutral fabric for the back, you can make two pillows.
The back of the pillows is cut into two pieces. These are 26 x 20 inches and 26 x 16 inches. This makes sewing the cover together easy.
This project is a smart way to save money on new pillows. Plus, it lets you pick your own style for decorating your home.
Key Takeaways
- DIY pillow covers can be made easily with basic sewing skills.
- Creating pillow covers is a budget-friendly way to update your home decor.
- Envelope pillow covers are simple and do not require zippers or buttons.
- Using one yard of fabric for the front and back can make two matching pillows.
- The project is beginner-friendly and can be completed in about 15 minutes once materials are prepared.
Introduction to DIY Pillow Covers
DIY pillow covers are a cost-friendly way to change your home’s look without buying new pillows. You can make covers for every season or event with simple tools. This method is not just about saving money. It gives your home a special, unique look.
When you make your pillow covers, you choose from many fabric types and patterns. You’ll find materials like chenille, velvet, and fleece in the home section of some stores. This means you can match your covers to any room’s design.
Many people dislike store-bought pillows because they wear out fast or bore them quickly. More folks are making their own pillow covers to freshen up their space. This DIY way means your pillows last longer, and you can change covers easily.
Usually, you need three fabric pieces to make pillow cases. The front panel stands out and is slightly bigger than your pillow insert. For example, if your pillow insert is 16″ x 16″, make the front panel 17″ x 17″. The two back panels should overlap on the front panel’s back.
To sew pillow covers, first, you sew the edge of one back panel. Then, you put the back and front pieces together. Finally, you sew around the edges to attach everything. This makes sure your covers fit well and look great. Many people love DIY pillow covers because they can choose the details themselves.
You can sew a set of pillow covers in just an afternoon, even if you’re new to sewing. You might think about making covers for pillows that are 16″ x 16″, 18″ x 18″, or 24″ x 24″. Remember, use a 1/2″ seam allowance for putting the cover together and a 1/8″ seam allowance for closing the gap by machine.
Spend an afternoon sewing, and you’ll have pillows that show off your style. Having homemade covers means your home always feels lively and new.
Materials Needed for Making Pillow Covers
Starting a project to make cushion covers means picking the right materials and tools. Choosing the perfect fabric and supplies greatly affects how your pillow covers will turn out. This includes both the look and success of your project.
Fabric Selection
The fabric you choose is key to customized pillow covers. You can use cheap drop cloths or splurge on pricey materials like the Braemore Gorgeous Pearl, which goes for about $30 a yard. Think about how the fabric looks and how durable it is. You might pick a favorite for the front and a plain one for the back to keep things balanced. If you’re making big pillows, 26 x 26 inches is a good size for a full appearance. Also, using wrapping paper can help line up fabric patterns just right.
Tools and Supplies
Having the right tools and supplies is vital for your DIY project. Here’s what you need:
- Fabric tape measure: For exact measurements
- Scissors or rotary cutter: To cut fabric cleanly
- Sewing machine: A basic one is fine for this
- Fabric: A yard for the front and back of each pillow cover
To make the back of the pillow, cut two pieces. They should be 26 x 20 inches and 26 x 16 inches. This size ensures they fit well and have a neat closure. For the hem, fold the fabric down 1 inch, then fold it again, and sew. This careful method makes a high-quality finish. Once everything is ready, sewing shouldn’t take more than 15 minutes. No wonder this DIY is so popular. It’s quick and the results are rewarding. It often leads to more customized pillow covers around the house.
How to Make Envelope Pillow Gas Covers Easily
Envelope pillow covers are a great starting DIY, especially for new crafters. They need basic, straight sewing and no zippers or buttons. By using the envelope method, you get a cover that’s both seamless and simple to wash.
Start by picking the right size for your pillow cover. Common sizes are 16×16, 18×18, 20×20, 22×22, and 24×24 inches. To get a good fit, the fabric should be measured as: pillow size x 2 + 6 inches. For example, for a 16×16 pillow, you would cut a 38×16 inch piece of fabric.
For the envelope style, make sure the fabric overlaps by 6-8 inches. This overlap lets the cover close neatly without any buttons or zippers. Here’s how you can make your own envelope pillow cover:
- Cut the fabric to the size you’ve measured.
- Overlap the fabric to create the envelope and make sure it’s 6-8 inches wide.
- Pin the edges so they stay together while you sew.
- Use a straight stitch to sew the fabric, creating a hidden overlap at the back.
You can finish an envelope pillow cover in about 20 minutes. You have a choice of inserts: down or polyester. Down inserts are softer but cost around $36.99 for two. Polyester inserts are less expensive but not as luxurious.
| Type of Insert | Cost | Feel |
|---|---|---|
| Down | $36.99 (set of two) | Softer, More Luxurious |
| Polyester | Less Expensive | Firm |
With these steps and advice, you’re ready for your envelope pillow DIY project. It’ll add both beauty and practicality to your living space.
Preparing Your Fabric
Before you start your pillow case tutorial, getting the fabric ready is key. This step ensures your homemade pillow covers look great and last long. Start by prewashing, ironing, and cutting your fabric, especially if it’s 100% cotton. This is important for making sewing pillow cases.
Prewashing Fabric
To avoid your pillow covers becoming too small after washing, prewash your fabric. Use a mild detergent and gentle cycle to wash it. Then, dry the fabric completely. This step handles any shrinkage early.
Ironing and Cutting
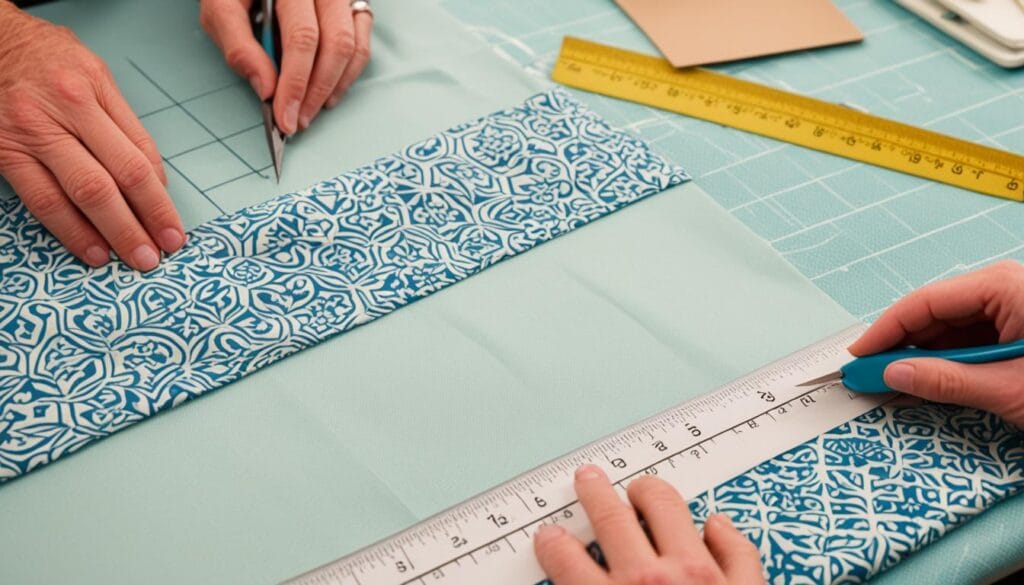
After prewashing, drying, it’s time to iron the fabric. This makes it smooth and ready for sewing. For an easier and professional finish, flatten your fabric well. Use a cutting mat, acrylic ruler, and rotary cutter for precise cuts.
Accurate cutting is crucial for your pillow case project. It’s about folding and cutting the fabric right for your design. Remember to keep some extra fabric, just in case you need it later. This tip is especially good for new sewers.
| Step | Action | Tools Recommended |
|---|---|---|
| Prewash | Wash and dry the fabric | Washing machine, gentle detergent |
| Iron | Iron out all creases | Iron, ironing board |
| Cut | Accurately cut the fabric | Rotary cutter, cutting mat, acrylic ruler |
These fabric prep steps are vital for making homemade pillow covers that are well-fitted and keep looking good.
Measuring Your Pillow Insert
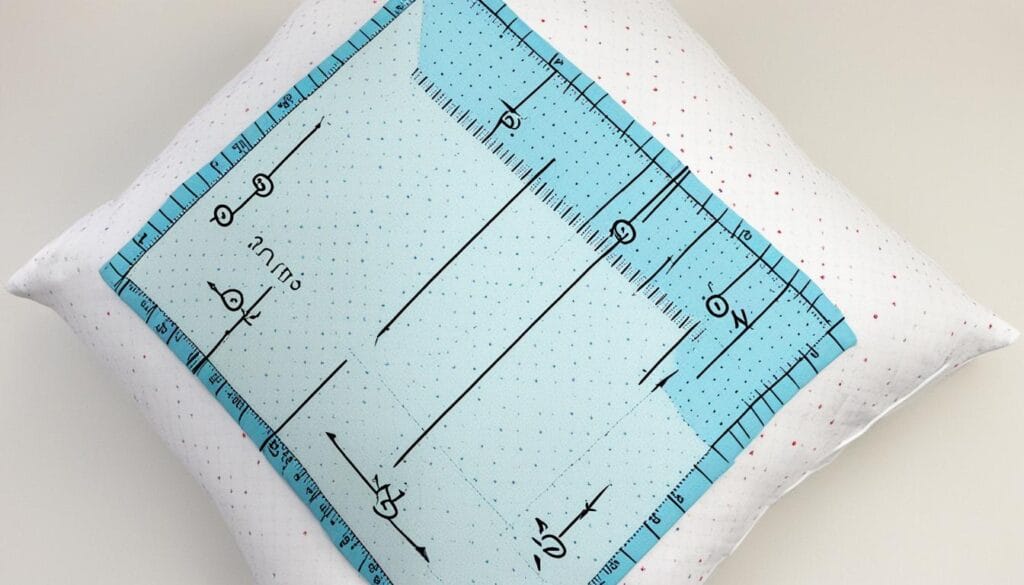
Getting the right size is key in making cushion covers. Remember, it’s good if your measurements are accurate within 0.7″. Sofa pillows are usually 18″x18″ or 20″x20″. But, bigger sofas might need 22″x22″ or 24″x24″. Using the right dimensions ensures your pillows will fit beautifully.
Measure your cover when it’s flat. Don’t measure a stuffed pillow. For instance, you can pull the top seam and measure alongside. This gives a good estimate if you can’t take the insert out.
| Type | Pillow Dimensions | Insert Size |
|---|---|---|
| Small Square | 17”x17” and smaller | Size up 1” |
| Medium Square | 18”x18”-20”x20” | Size up 2” |
| Large Square | 22”x22”-24”x24” | Size up 2-3” |
| Extra Large Square | 26″x26″ and larger | Size up 3-4” |
| Small Lumbar | 11”x19”-11”x23” | Size up 1” |
| Medium Lumbar | 14”x22”-15”x23” | Size up 1-2” |
| Large Lumbar | 13”x34”-18”x48” | Size up 2-3” |
For a 18″x18″ insert, cut your fabric 20″x20″. This ensures a perfect fit. Extra fabric for seams helps. It also makes it easy to remove and clean. These steps will lead to lovely, custom-made pillow covers for your home.
Sewing the Pillow Cover
Sewing pillow cases is easy and fun. Follow simple steps to make your own beautiful covers. This DIY project turns fabric into personal home decor.
Hemming the Edges
First, hem the back fabric’s edges. This is key to a tidy envelope closure. Press a 1-inch hem on the narrow ends of each back piece. Sew them down. This step stops fabric from fraying and helps it lie flat in the cover.
Assembling the Pillow Cover
Then, place the front fabric facing up. Put the back pieces on top, aligning the edges. Overlap the hemmed ends to create the closure. Pin everything together. This easy method leads to perfectly placed pillow covers.
Final Stitching
Finally, sew around the cover with a 3/8-inch seam. Backstitch at the start and end to reinforce. Trim extra fabric at the corners. Turn the cover right side out and put in your pillow. This makes your custom cover fit well and look pro.
Here are the key materials and tools for this project:
| Material/Tool | Details |
|---|---|
| Fabric | $30 per yard, Braemore Gorgeous Pearl fabric |
| Pillow Insert Size | 26 x 26 inches (Euro inserts) |
| Fabric Cutting Dimensions | Front: 26 x 26 inches, Back: 26 x 20 inches and 26 x 16 inches |
| Time Estimation | Approximately 15 minutes |
| Project Complexity | Beginner level |
| Hem Allowance | 1 inch |
Follow these steps carefully. You’ll enjoy making custom pillow covers. They will add personality and function to your home.
Adding Decorative Elements
When making your own pillow covers, adding more than just the basics can make them special. Start by looking into iron-on designs and stencils. They are an easy way to add your own graphic and pattern style. This makes your decorative pillow covers unique and eye-catching.
Don’t overlook items like tassels, ribbons, and buttons. They bring a lovely detail to your customized pillow covers. For extra texture, try adding fabric appliqués or using fabric paint for detailed designs. Craft stores offer many iron-on patches and embroidery kits, opening up even more creative options.
Using budget-friendly materials like napkins can be smart. Covering from $2.69 napkins can cut your total cost. With a 20 x 20 pillow insert, a 20 x 20 napkin works well, making the final cover about 19 x 19 inches.
For a top-notch, unique look, use two napkins if you’re making two-sided pillows. This ensures both sides look stunning. It’s a small extra cost to have beautifully designed pillows.
Tips for Beginners
Starting a pillow cover DIY can be very rewarding, especially for newbies. Here are some key tips to get you started the right way without falling into common traps.
Common Mistakes to Avoid
Starting a sewing project can seem tough, but knowing key mistakes can make things easier. It’s critical to measure your fabric right to avoid poorly fitting covers. Always use a fabric tape measure for accuracy. Be sure to pick the correct needle and thread. The wrong ones can lead to bad stitches or fabric damage. Choose materials that match your fabric.
Best Practices for Easy Sewing
Making a pillow cover can be simple if you follow some good practices. Have a seam ripper ready for any quick fixes. It’s smart to plan for extra fabric. This covers mistakes and makes sure you have enough for the hem. Remember, the usual hem allowance is 1 inch for back pieces.
It’s also a good idea to wash and iron your fabric before cutting and sewing. This stops shrinkage and makes things smoother. Pick an easy pattern with straight seams for a smooth start. Make sure you have the essential tools, like a simple sewing machine, pins, and scissors, to help you along.
Using these tips, you can make stunning, personalized pillow covers. Whether it’s a 16 by 16 inch size or any other, you can still get pro results as a beginner. Stick to these tips for success.
Care and Maintenance of Homemade Pillow Covers
Keeping your homemade pillow covers neat and long-lasting is vital for a lively home decor. Good care means your *DIY creations* will stay beautiful. Here are top tips for looking after your handmade pillows:
- Cleaning: Always check the washing instructions for your fabric. Like, cotton and linen may be fine in a machine on gentle. But silk and velvet might need dry cleaning.
- Ironing: After washing, iron your pillow covers to keep them neat. Choose the right iron setting to protect the fabric.
- Storage: A cool, dry spot is perfect for storing pillow covers. Use fabric bags to keep them safe from dust and damp.
Knowing how to care for different fabrics can stop them from getting ruined. Here’s a guide for washing, ironing, and storing linens:
| Fabric Type | Washing Method | Ironing Setting | Storage Tips |
|---|---|---|---|
| Cotton | Machine wash, cold or warm | High heat | Store in a dry place |
| Linen | Machine wash, gentle cycle | High heat | Use fabric storage bags |
| Polyester | Machine wash, cold | Low heat | Avoid direct sunlight |
| Velvet | Dry clean | Not required | Store flat, avoid crushing |
| Silk | Dry clean | Low heat | Keep away from direct sunlight |
Following these care guidelines will keep your pillow covers in great shape. Understanding how to care for your *DIY pillow covers* is part of the crafting process. These tips will help your pillow covers last longer and stay an attractive part of your decor.
Conclusion
Learning to make pillow covers at home is a great DIY skill. It lets you customize your decor and is a fun way to be creative. This guide has shown you every step, from picking the right fabric to the final touches. Now, you can make pillow covers in classic styles or get creative with your own designs.
Remember, when picking materials, certain sizes and seam allowances matter a lot. For a professional look, use a 1/2 inch seam. Also, consider mix and matching fabrics like velvet and cotton. Lighter fabrics are great for the warmer months while thicker ones keep things cozy when it’s cold.
Mixing creativity with practicality is the secret to successful pillow making. With trends moving towards personal touches, custom covers are becoming more popular. Keep practicing, and you’ll be able to make unique pillow covers for any room. Enjoy the benefits of making your own decor. It’s fun and rewarding.

